
|
Step 1
Step 2
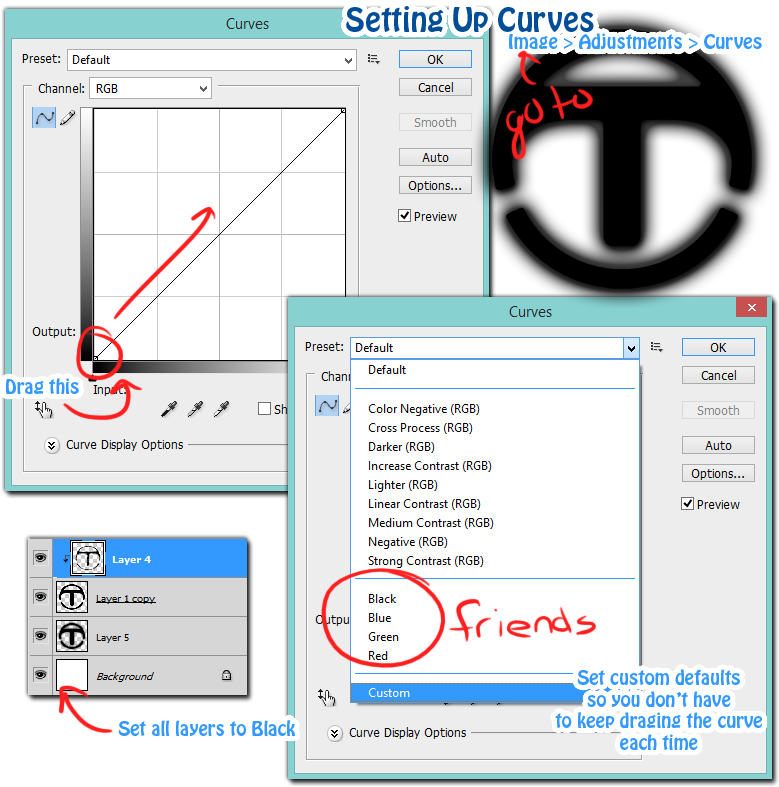
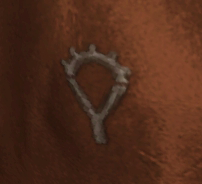
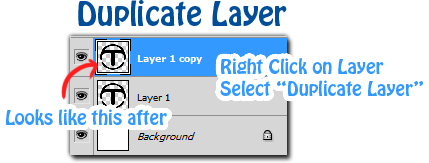
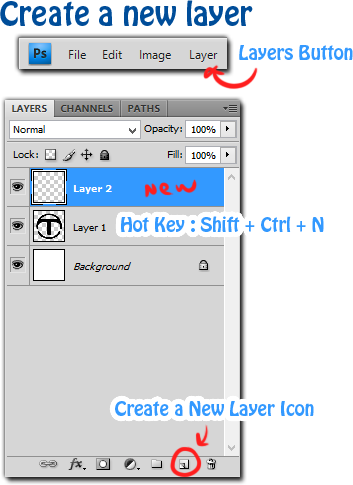
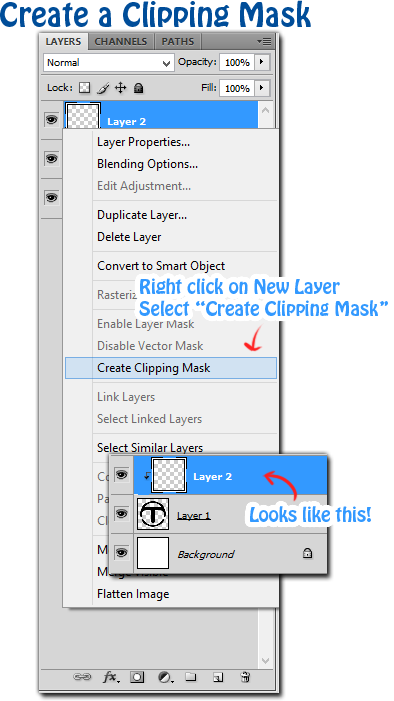
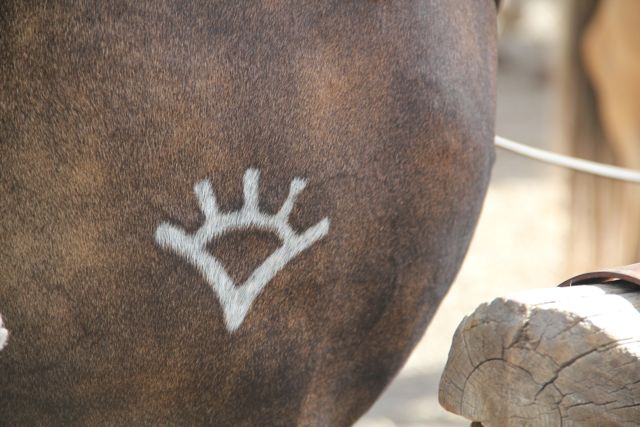
Step 3CORRECTION: For this step you actually need to have the BOTTOM layer selected. NOT the middle one. 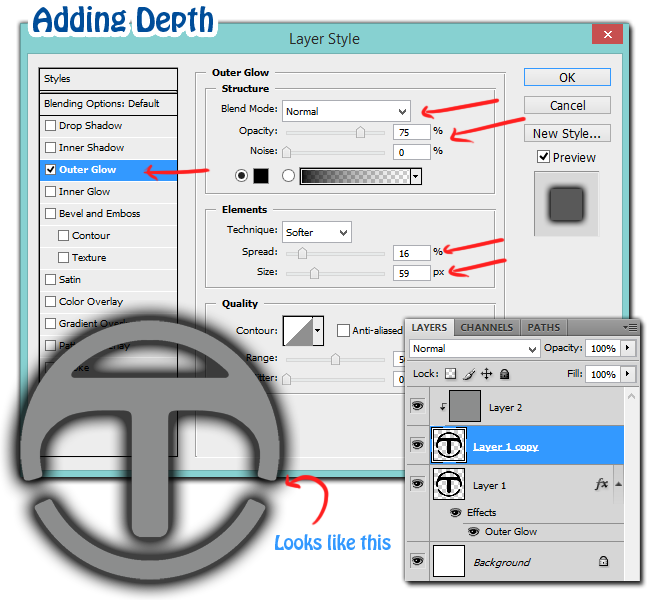 This method really makes the brand pop. I filled the clipping layer with a grey so that you could see the different layers. Selecting the BOTTOM layer, double click to open the layer properties. Play with the Outer Glow options, or just use what I used above. 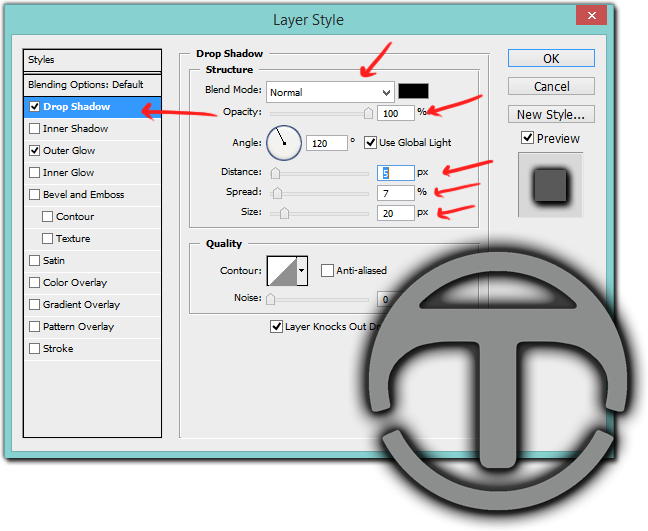 Select the Drop Shadow option, and play with those settings. It just adds a little extra opacity to the outer edges, and adds it at an angle. Tips & Tricks: I find I can do pretty much everything by playing around with the layer properties. Some brand look like they are sunken-in in the middle, others are raised up, some are even both. Check out the Bevel and Emboss properties of your layer to play around with this. Step 4Things I might do differently: In my previous brand I think I took advantage of the Blurring options. I smudged and blurred the layer we are drawing right now, as well as blurred the actual brand slightly so their lines were not so crisp. 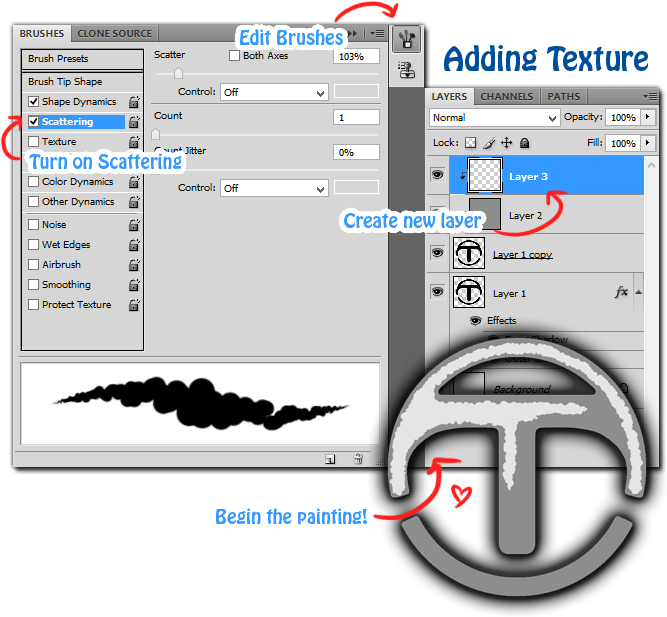 Create a new layer and make sure it's clipped with the other one. Select the BRUSH OPTIONS and turn on scattering. This works best with a pressure sensitive tablet. If you don't have one, I'm sure you know how to manipulate your mouse by now. Using the layer you just created, paint within the borders of your brand. Try to avoid touching the edges. This layer will be the lighter areas of the brand. The brush scattering is to add texture and movement. Tips & Tricks: If you have a table with pressure sensitivity, play around with your brush settings to vary the opacity, this can add additional texture to your brand. Just keep in mind to not have this layer at 100% opacity. Lower the opacity of the layer you just painted on, and then create a new clipped layer over it. With a 100% opacity brush, brush within the previous layer. These strokes to not need to all be connected. 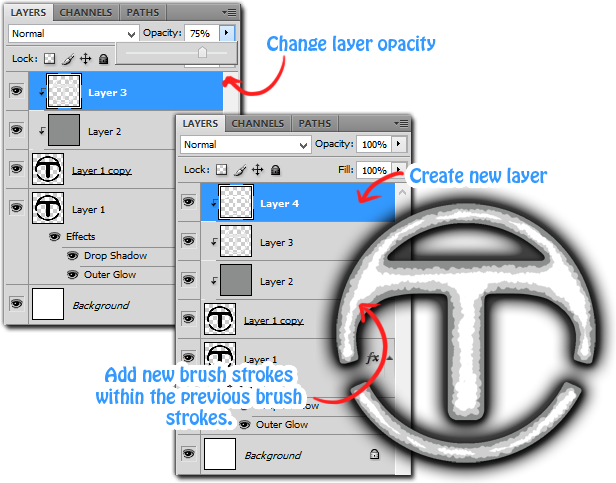 Step 5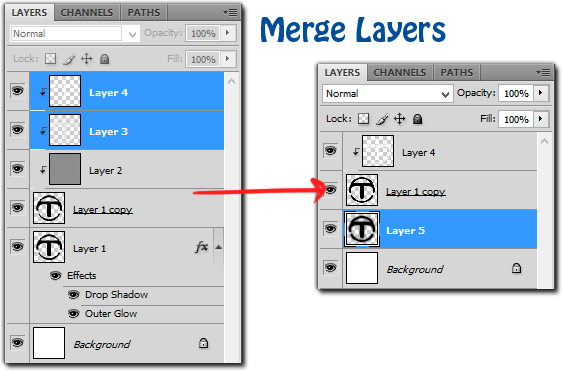 Now merge all your layers. Merge the top 2 clipping masks (I deleted the grey clipping mask, that is not needed, DO NOT merge that one with the others). To merge layers together, make sure each is highlighted and right click, the option MERGE LAYERS should come up at the bottom. Other options come up as well, but that is not the one you want. If Merge Layers does not show up, there may be a problem with how you selected the layers. Do not Merge Visible, it will merge everything that is showing. Important to note: I added a new layer (either above or below) the bottom layer we made with the Drop Shadow and Outer Glow. I then selected those two layers and merged them. This locked our layer options into place. Step 6The following is on how to setup your brand for saving. I won't go into much detail as there are other tutorials out there that already show this. But the key things to know are:
 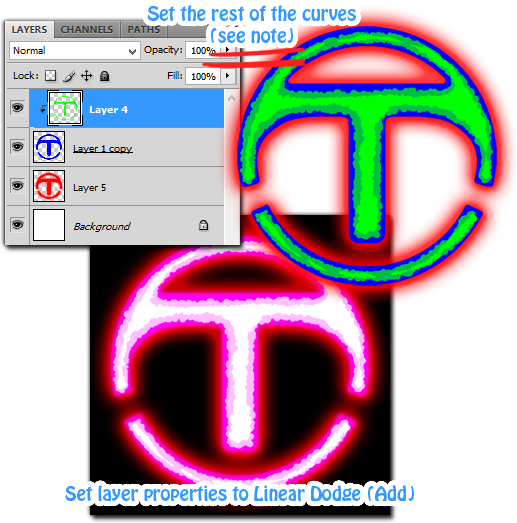 STOP!! : I made a mistake in the order of colors above. When making markings the order of color from bottom to top should be Red, Green, Blue. When you set everything to Linear Dodge (Add) like I did in the Black image above, you SHOULD SEE Red, Yellow, and White, NOT PINKS. Step 7The following steps show how to put your brand on the 3D rig so you can test it out. The 3D Rig will only open with an extended version of Photoshop 4 or higher. 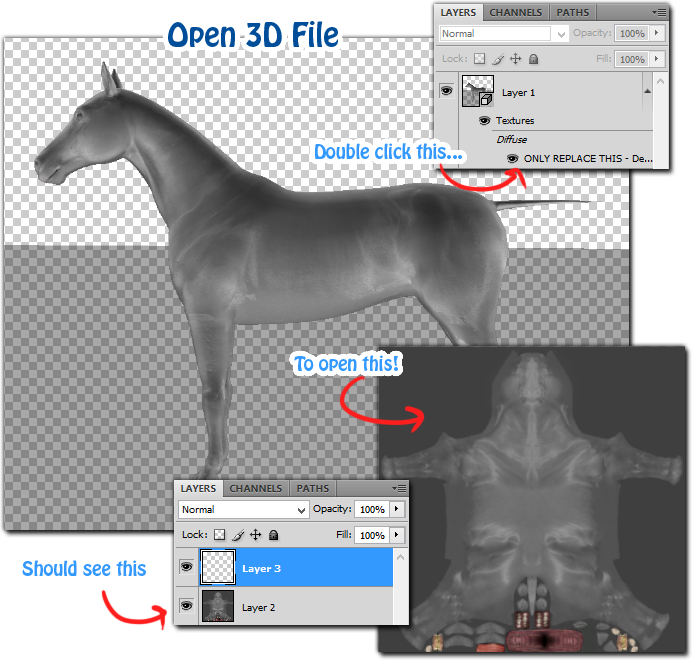 Step 8This is where the 3D rig really comes in handy because placing a brand can be a real time consuming process due to how the skin wraps around the skeleton. Additionally we have sliders that might cause the brand to warp once we put it in game. 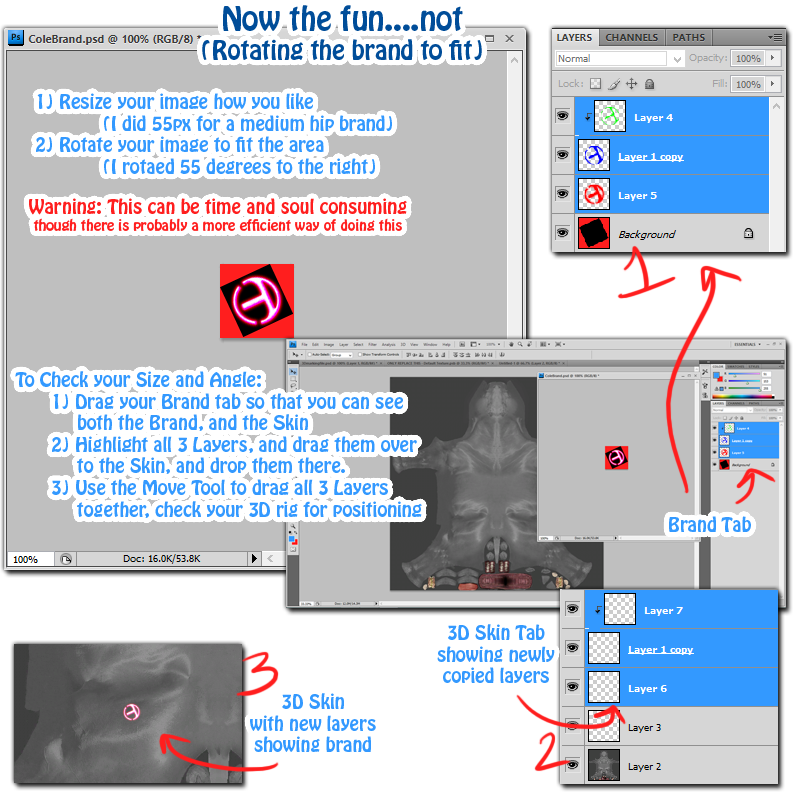 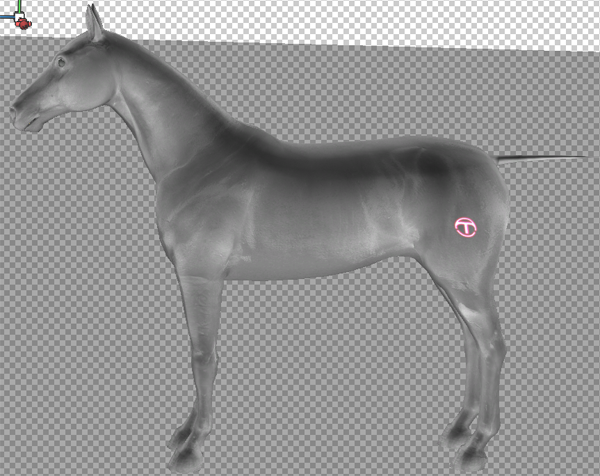 Step 9Now we're back to standard operations of wrapping up a package file. I used Faewoods Empty Marking Files for this, and pulled out the 3 Channel one. Make sure that under Type is says Body, and then for Region, pick which category you want your marking to be found. I usually use belly or back, since they have such few markings. 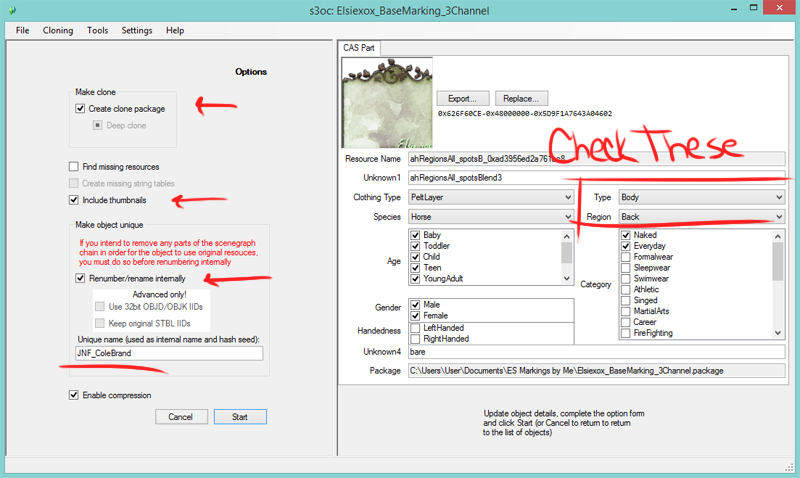 Step 10These use Faewoods Empty Marking Files, other ones out there will look different and may come with multiple thumbnails. If I recall, the larger thumbnail is the one that gets replaced. 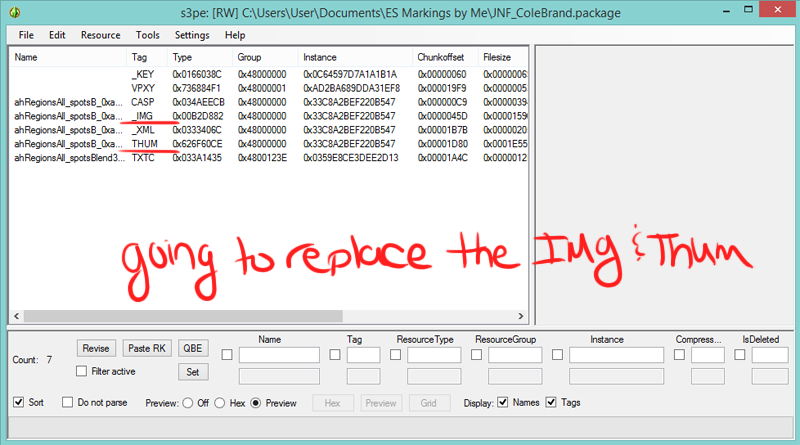 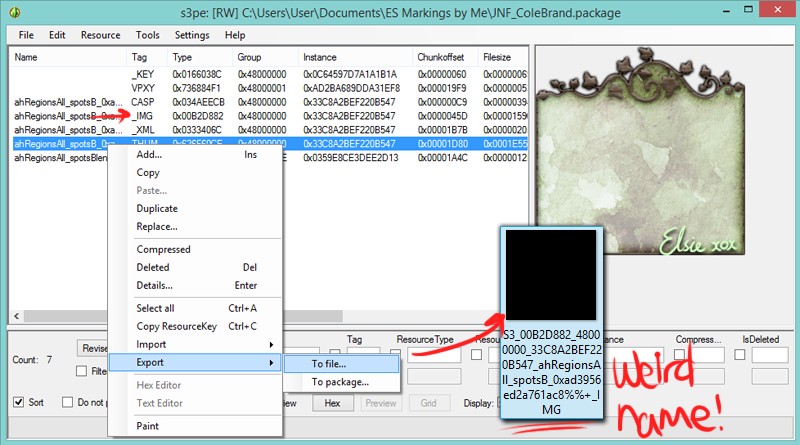 Both the thumbnail and the IMG are going to have a crazy long name like the picture above. When selecting the place to save them, it's recommended they are isolated some where easy to get to, but also not bunched together with other files with similar names. Or else you wont be able to tell which file belongs to which package, and your package wont work. And they can't be renamed. Step 11To save your brand, open up the skin on your 3D rig if you've closed it, and create a new layer between the Skin and the first Brand layer. This will be filled with pure Black at 100% opacity. You will then go to File > Save As > DDS File. Find where you exported the previous files, and save over the DDS one that pops up (this is your IMG file). When you save, something like this might pop up, not sure if it's the same for everyone. But the DXT5 ARGB 8 bpp is the MOST IMPORTANT THING. 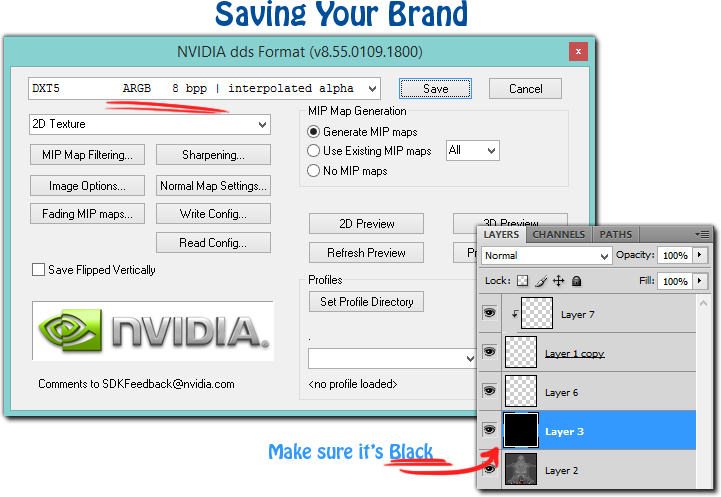 The Thumbnail is a PNG file if I recall. It needs to be a specific size, and the one you exported should already be sized to use. Open that up, and use its size to recreate a more personalized thumbnail. They can also be transparent. Save over the exported Thumb as a PNG. Step 12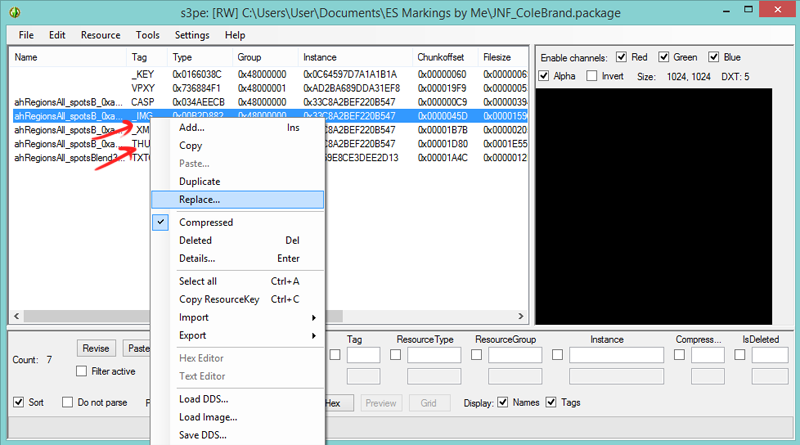 Replace both the IMG and THUM files with the ones you just made, save, and test in game! It should look awesome, if not, go back and troubleshoot to see what happened, and if that still doesn't work, send me a message. <3 Happy Trails,
|
CC Creation Files |  Cow Markings from the 2015 Equus-Sims Advent |
Also known as JNFerrigno in the Horse Art & Game community, Farai Borde has put together a free collection of Custom Content for all the SIM Equestrian communities out there. No joining or logging in required!
All
Appaloosa
Arabian
Base
Belly Markings
Cow
Dog
Donkey
Draft
Dun
Face Markings
Foal
Leg Markings
Lots
Markings
Misc
Moveable Markings
Mule
Pinto Markings
Racing
Resources
Russian
Sabino
Shaders
Spanish
Standardbred
Stock
Tobiano
Tutorial
World
Zebra
 RSS Feed
